
Floor cushions and ottoman, Part TWO
This is a continuation of my floor cushion/ottoman project. Part One discussed cutting foam, covering them with batting, and making a permanent cover for each. This post will show my process step-by-step of making the removable covers. Part Three will discuss the ottoman cover.

For each cushion, I purchased 1.5 yards of 54" wide fabric. I bought these coordinating prints from Fabric.com. I bought these all from their Magnolia Home Fashions line, and each print was about $10/yard, which is a great price. I could have possibly beat this price by buying at Joann Fabrics with coupons, but I don't have a ton of time these days to do extended trips to Joanns. While my family was waiting in the car I ran in and took photos of their foam, home decor fabric, batting, and muslin! That was how I found prices while doing my price research. Make sure to prewash your fabric!
Dimensions
As I mentioned in my previous post, when figuring out dimensions for your covers, don't worry about the added width from batting. Go by the foam measurements. So for my foam, which was 30.5" x 24.25" x 4", I added 1/2" seam allowance, and cut my two large pieces 31.5" x 25.25". Then I needed to plan out the gusset. I'm not sure my way is the official way but it seemed to work out well, so I'll tell you my process. To figure out how long the gusset needed to be, go by the foam measurements, not the measurements of your fabric piece. So 30.5+30.5+24.24+24.25=109.5". Now you need to figure in your zipper. I bought zippers here. I bought 36" long zippers, one for each cushion and two for my ottoman. They are nylon coil zippers with closed ends. So the zipper panel needed to be 36" + 1" for the seam allowance. Half the width of the gusset would be 2", plus seam allowances. So I cut out two pieces of fabric 37" x 3" for the zipper panel.
Now for the rest of the gusset. Subtract the length of the zipper from your total gusset length. 109.5"-36"=73.5". Since I only had 1.5 yards, I needed to divide this in half. 73.5/2= 36.75. Don't forget seam allowance! I cut one piece 5" x 37.75". For the remaining piece, I wanted to add a zipper tab cover. I'll describe how to do that later, but it means adding in a couple inches of length to just one of those gusset pieces. So I cut out one piece of fabric 5" x 39.75".
If you'd like a list, here it is:
- (2) 25.25" x 31.5"
- (2) 3" x 37"
- (1) 5" x 37.75"
- (1) 5" x 39.75"
- Plus one zipper 36"
- PLUS 6.25 of pre-made piping/welting, which I will get into below. I bought my piping here on Etsy. They were having a huge sale, which made it very affordable. I used 28 or so yards for this project and that would normally be incredibly expensive. Piping can be made fairly easily, which I won't go into, but that's always an option.
Sewing the cover
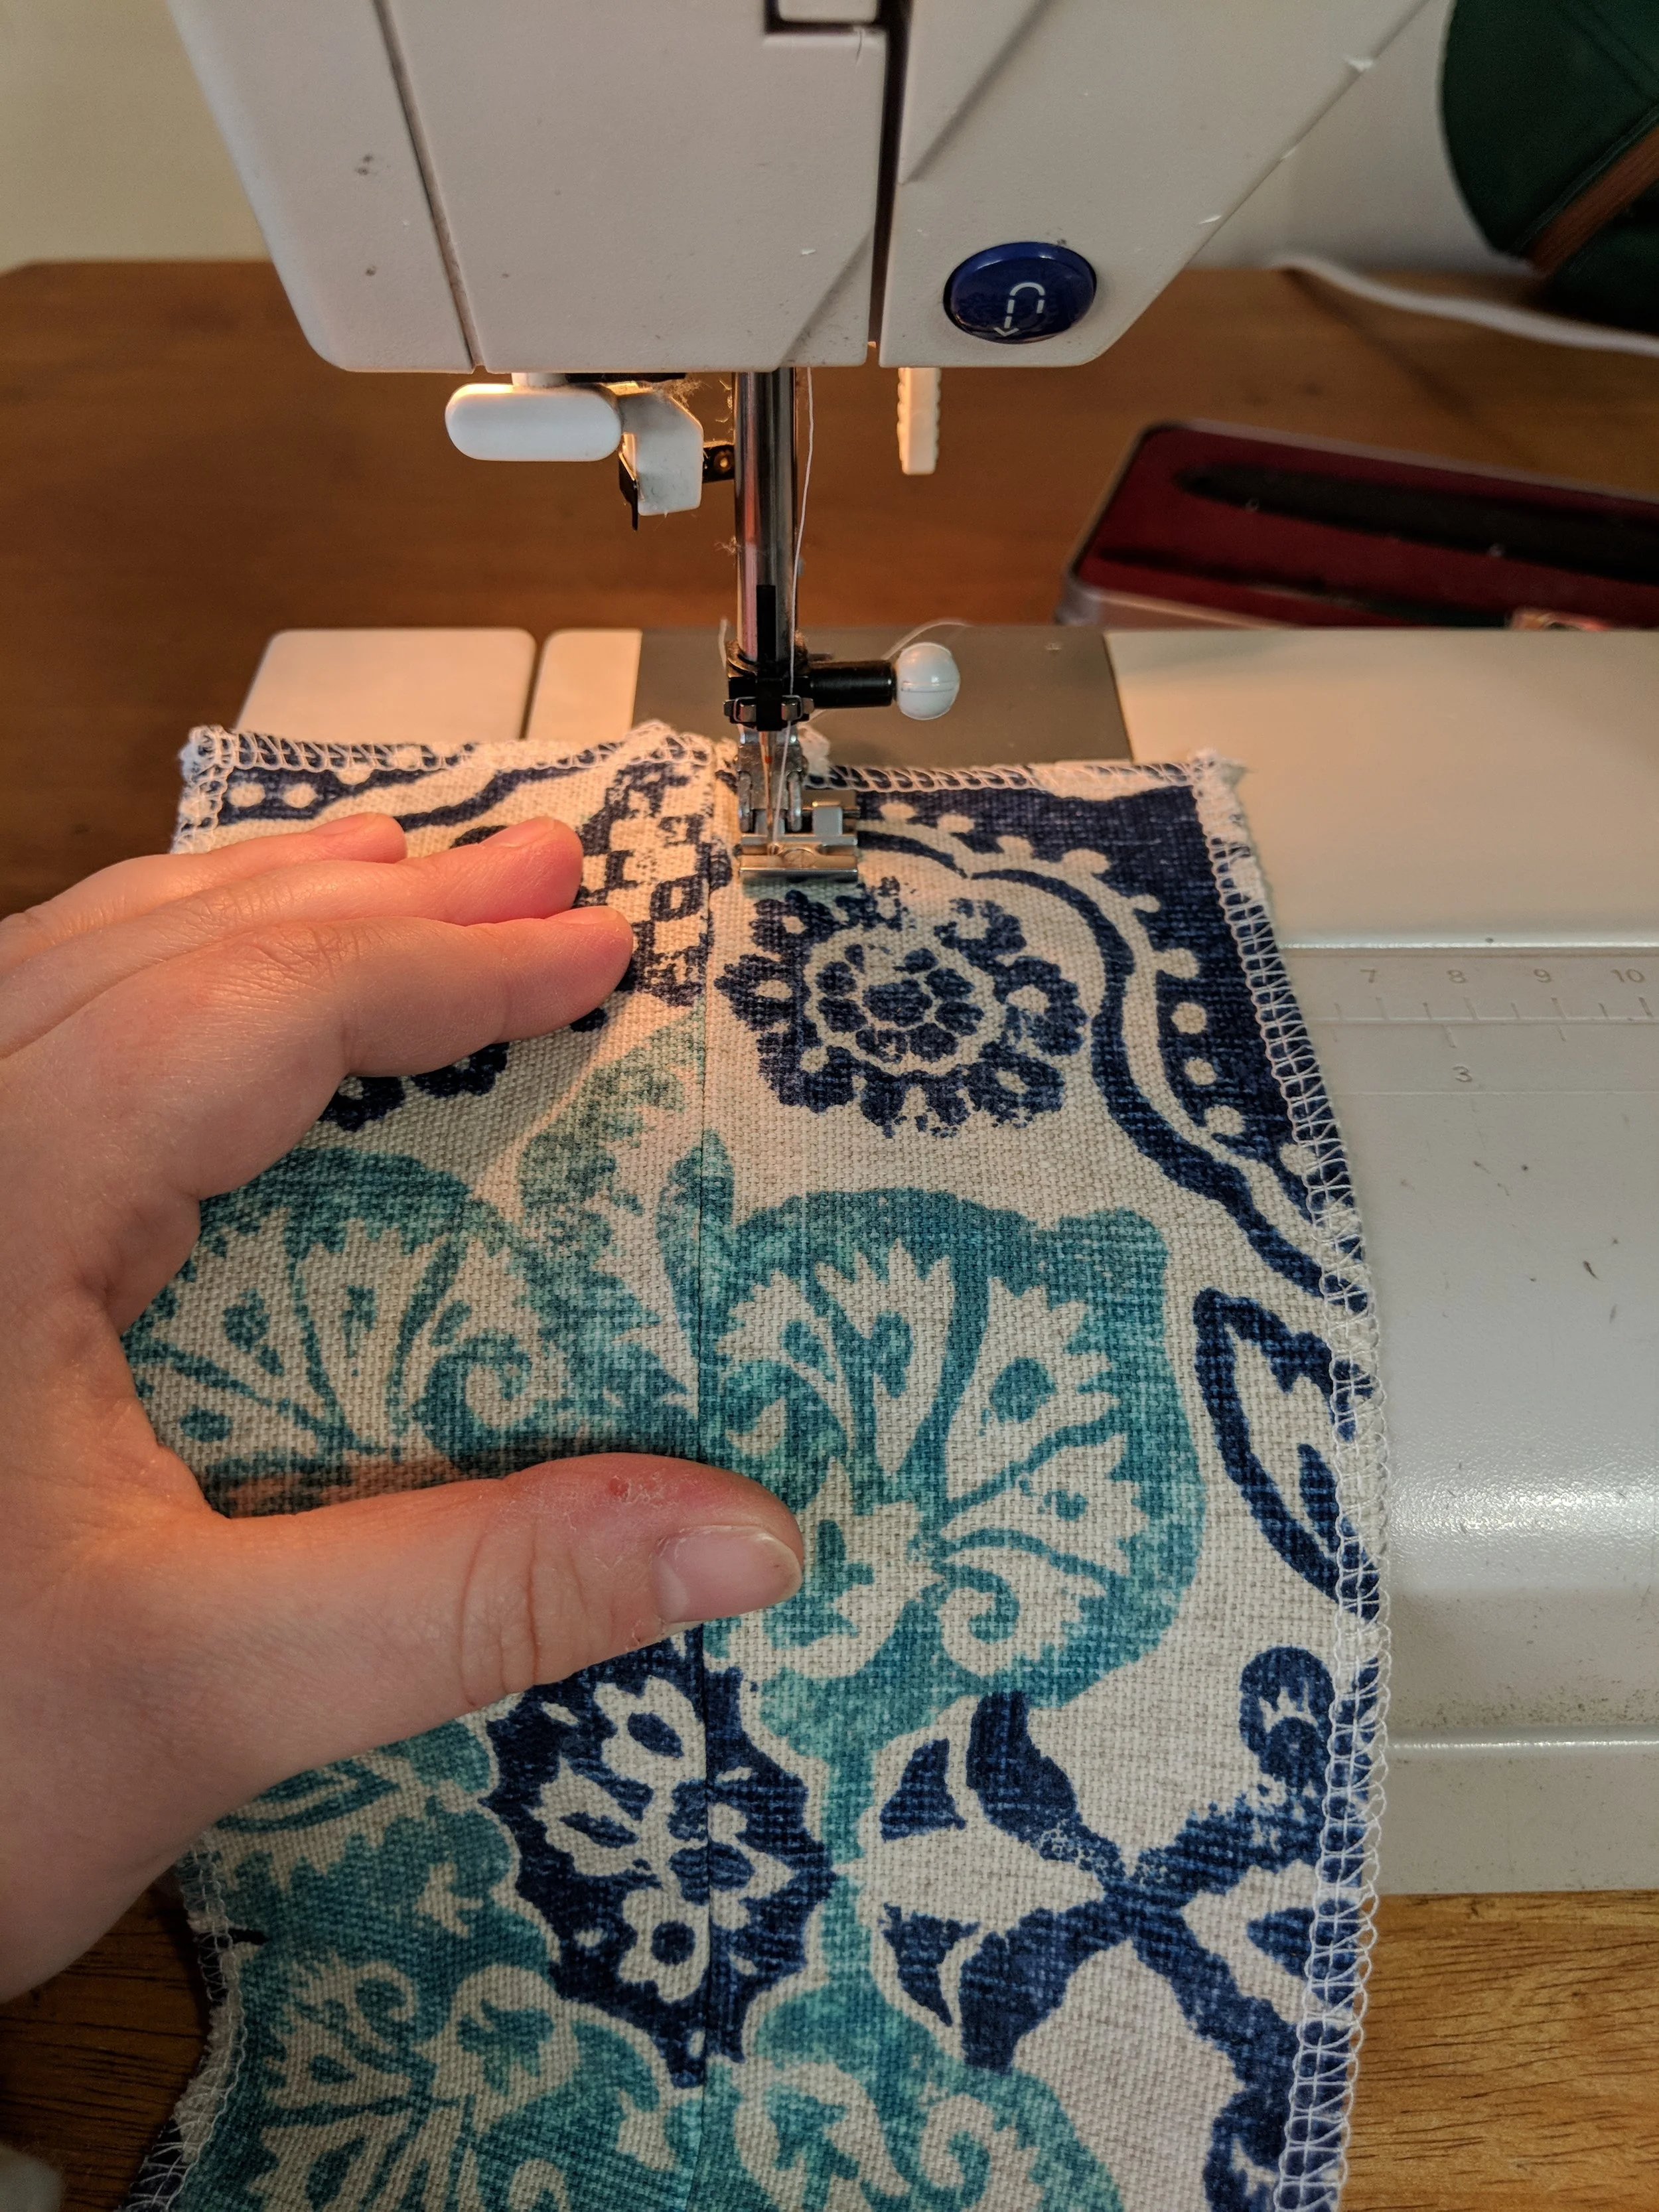
1. I serged the edges of all my pieces to prevent them from raveling. You can do this, or zigzag the edges, or sew the seam and then serge and zigzag. I did it all at the beginning. When serging my large rectangles, I curved around the corners. This will make sewing on the gusset much easier.


2. Take your two zipper gusset pieces and baste them right sides together along one of the long sides. Press that seam open. Pin the zipper right under that seam, facing up towards the seam. (The second photo shows what it looks like under the seam). Honestly, I only pinned the first. After that I just held the zipper under the seam in the right spot and sewed. Make sure that your zipper ends are half an inch from the edge of the fabric. I topstitched on either side of the seam (with a zipper foot), about 3/8" away from the seam, but making sure to catch the zipper tape. Then I seam ripped the basted seam to remove the stitches, and picked out the extra threads.


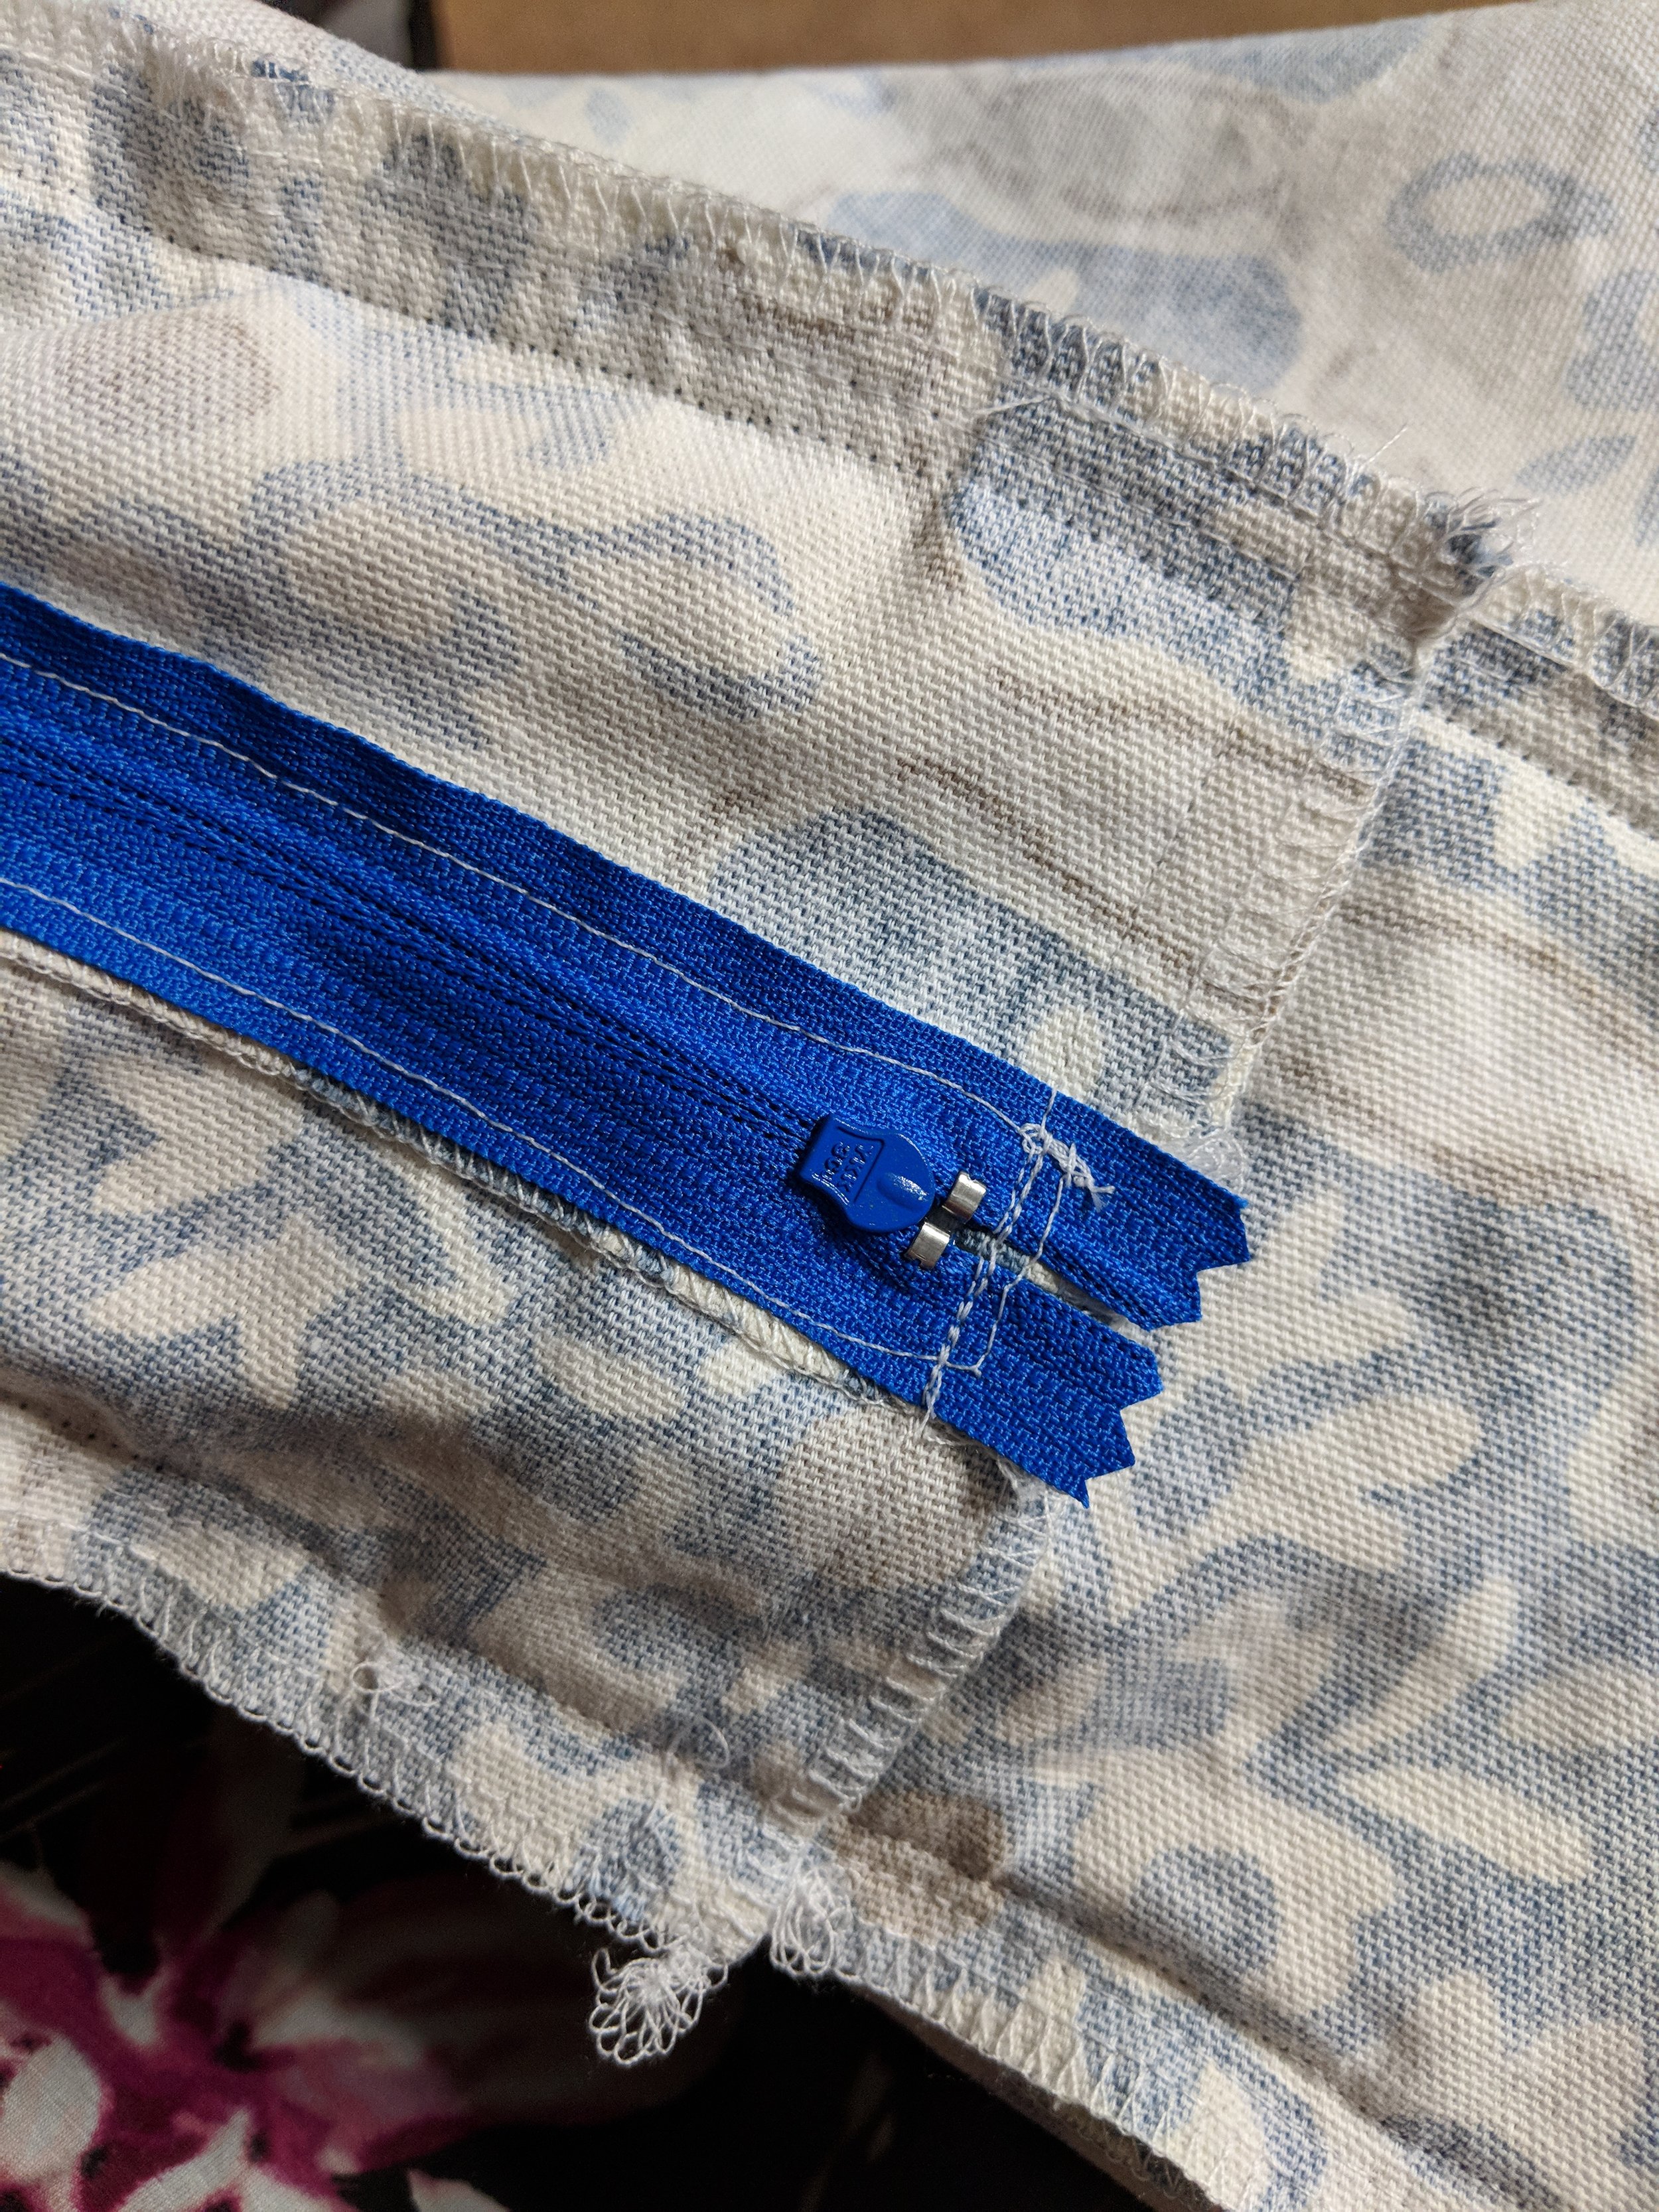
3. Take the longer gusset piece (5"x39.75") and sew it to the end of the zipper panel where the zipper tab is. This is easier if you unzip the zipper a little first. Then, fold the fabric over the end of the zipper by an inch. Iron (don't linger over the zipper coils) and baste the seam on the edges, where my pins are in the second picture. I added a row of stitches at the end of the zipper to keep the fold in place when you use the zipper. The fourth and fifth photos show how the zipper tab is hidden. Then sew the other gusset piece to the other end of the zipper panel, and topstitch it. Sew the two gusset ends together, and topstitch either side of that seam (last picture).


4. Using piping, or welting, is completely optional, but I felt like it would give these cushions a more finished, less homemade look. I stumbled across a shop doing a huge sale on Etsy. When you start, pull the end of the fabric down to expose the inner cording. Snip off an inch or so, then pull the fabric back up. This will reduce bulk in the seam. Use your zipper foot to baste on the piping. I sewed it to both sides of the whole gusset. Start with it off the edge of the fabric and then taper it to the right spot. The piping has two parts-- the round part around the cording and then a lip. Make the edge of the cording be your seam allowance (1/2" for me) away from the edge so when you sew that seam, it will stick out the correct amount. I basted the piping on using my zipper foot with the needle in the middle so there's no chance of my stitches being visible later. Go all the way around the gusset. When you get to the end, repeat the first step of snipping off the end of the cording and taper the piping off the edge. Those pieces hanging off can be snipped.


5. Fold your gusset in half and mark the middle with pins on both sides of the gusset. Then fold it in half the other way and mark the middle with pins. Now do the same for both large rectangles. This gives you a reference for pinning the gusset to the sides. Pin the middles first and then pin towards the corners. Now, this is where you will have to ease in the gusset to a certain extent. That means stretching the gusset slightly while pinning. When you get to the curved corners, you should have enough to pin it easily around the corners. If you don't have enough, re-pin, stretching more. If you have too much gusset, re-pin without stretching. Some places I had to stretch more than others but it all turned out great. Once the gusset is pinned all the way around, use the zipper foot to sew it together. Your stitching should butt up to the edge of the piping. Repeat whole process, pinning and sewing gusset to the other rectangle side piece. However, I recommend unzipping the zipper a little before doing the second side, otherwise you'll be done and realize you can't turn it right side out!


6. You are done sewing! Turn the cover right side out and poke out all the corners. You can topstitch the gusset seam, but I tried putting the cover on and it looked fine, so I didn't topstitch. Pull on the cover like a pillowcase. You'll have to work at it because the cover should be a little smaller than your cushion. Zip it up, and you are good!


And in a surprisingly quick amount of time--one, two, three, four, I had my new cushions! Not pictured are the handles I went back and made for each. They should make them easier for the kids to haul around.


The final post will be about the ottoman, though I admit I got tired of the project at that point and didn't take process photos. But I will try to describe what I did as well as I can. I love how these cushions turned out and how professional they look. My kids all like them, and they are even comfy for grownups. This is definitely one of my nicest projects I've made!